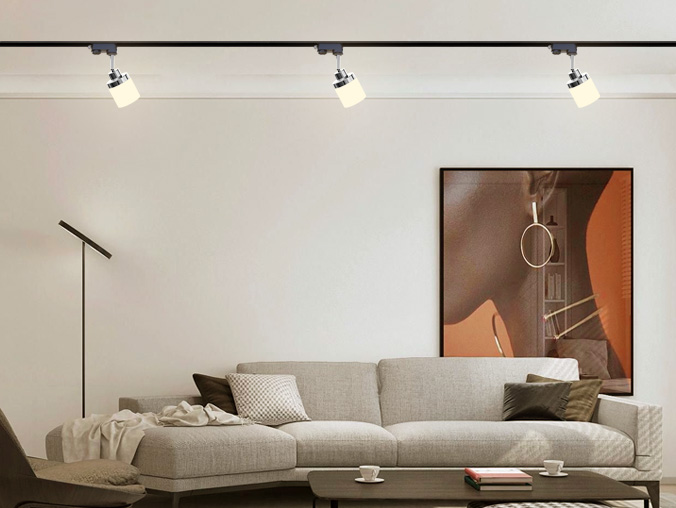

In the world of modern lighting, dimmable LED track lighting has become a popular choice for both homeowners and professionals due to its energy - saving features, stylish design, and flexibility. At IMIGY Lighting, we are committed to providing you with not only high - quality dimmable LED track lighting products, such as our Flame Track Lights and Eternity Track Lights, but also clear guidance on how to install them. These lights, as part of our advanced adjustable track lighting system, are designed with user - friendly installation in mind. Here is a detailed step - by - step installation guide for our dimmable LED track lighting.
I. Preparation Before Installation
Before starting the installation process of your dimmable LED track lighting, thorough preparation is essential. First, gather all the necessary tools. You will need a drill, screws, a level, a measuring tape, wire strippers, and a voltage tester. Make sure to turn off the power supply in the area where you will be installing the lights to avoid any electrical accidents.

Next, carefully unpack your Flame Track Lights or Eternity Track Lights. Check that all the components are included, such as the track, light fixtures, and mounting hardware. These high - quality China led track lights come with everything you need for a smooth installation. Familiarize yourself with the product manual, which contains important information about the product's specifications and installation instructions.
II. Planning the Installation Location
The next step is to plan the installation location of your dimmable LED track lighting. Decide whether you want to install it as ceiling magnetic track lights or ceiling track lighting on the ceiling, or if you prefer a wall - mounted installation. Consider the layout of the room and the areas that need to be illuminated. For example, in a living room, you might want to install the Eternity Track Lights on the ceiling to provide general illumination, while in a gallery, the Flame Track Lights could be installed on the wall to highlight artworks.
Use a measuring tape and a level to mark the position of the track accurately. If installing on the ceiling, make sure the track is straight and centered. If it's a wall - mounted installation, ensure that the track is at a suitable height and angle for the desired lighting effect.
III. Mounting the Track
Once you have planned the location and marked the position, it's time to mount the track. For our Flame Track Lights and Eternity Track Lights, which are part of the adjustable track lighting system, the mounting process is relatively straightforward.
If you are installing on the ceiling, drill holes at the marked positions and insert the screws. Hang the track on the screws and tighten them to secure the track firmly in place. The magnetic track of our lights makes it easy to attach the light fixtures later. If it's a wall - mounted installation, follow a similar process. Drill holes in the wall, insert the screws, and mount the track.
IV. Wiring the Track
After mounting the track, the next crucial step is wiring. First, ensure that the power is still off. Locate the electrical box where you will connect the track. Strip the wires at the end of the track and in the electrical box. Connect the wires according to the wiring diagram provided in the product manual. Our dimmable LED track lighting products, like the Flame Track Lights and Eternity Track Lights, are designed to be compatible with standard electrical systems. Once the wires are connected, cover the electrical connections with wire nuts and secure them.
V. Attaching the Light Fixtures
Now comes the exciting part - attaching the light fixtures. Our Flame Track Lights and Eternity Track Lights feature a magnetic attachment mechanism. Simply align the light fixtures with the track and let the magnetic force hold them in place. You can easily move the fixtures along the track to adjust their position according to your lighting needs. For example, in an office, you can position the fixtures to provide focused lighting on workstations.
VI. Testing the Dimmable LED Track Lighting
After attaching the light fixtures, it's time to test your dimmable LED track lighting. Before turning on the power, double - check all the connections and ensure that everything is secure. Then, turn on the power supply and test the lights. Check if the lights are working properly and if the dimming function is operating smoothly. If there are any issues, turn off the power immediately and re - check the installation steps.
Installing dimmable LED track lighting, such as our Flame Track Lights and Eternity Track Lights, is a manageable task when you follow these step - by - step instructions. These lights, as high - quality China led track lights, not only offer energy - saving and stylish lighting solutions but also come with user - friendly installation features. Whether you are a DIY enthusiast or a professional installer, you can successfully install our dimmable LED track lighting and enjoy the benefits of a well - lit and modern - looking space. Let IMIGY Lighting be your partner in this lighting installation journey, and together, we can create a more beautiful and functional living or working environment.
It is recommended that you upgrade the latest browser
 Chrome
 Firefox
 Edge
Edge