


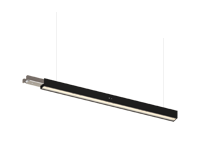


In the dynamic world of interior design, lighting serves as a transformative element that can breathe life into any space. At IMIGY Lighting, we understand the significance of lighting in creating the perfect ambiance for your home or business. Our ceiling - mounted track lighting, especially the Flame Track Lights and Polaris Track Lights, not only offers exceptional lighting quality but also comes with an easy - to - follow installation process. This guide will walk you through the steps of installing our dimmable COB LED track lights, which are part of our magnetic track system, ensuring a seamless and hassle - free experience.
The Significance of Ceiling - mounted Track Lighting
Ceiling - mounted track lighting has become a popular choice in modern interior design due to its versatility and flexibility. It allows you to customize the lighting layout according to your specific needs, whether it's highlighting a piece of artwork, illuminating a work area, or creating a cozy atmosphere in a living room. With the integration of COB (Chip - on - Board) LED technology, our track lights provide a high - quality, concentrated, and uniform light output, making them an ideal choice for both residential and commercial applications. As a magnetic track light supplier, we ensure that our products, like the Flame Track Lights and Polaris Track Lights, are compatible with our advanced magnetic track system, which simplifies the installation process even further.
Installation Preparation
Tools and Materials
Before starting the installation, gather the necessary tools and materials. For our Flame Track Lights and Polaris Track Lights, you will need a drill, screwdriver, level, wire stripper, electrical tape, and the mounting hardware provided with the product. The track lights come with all the components required for installation, including the track, light fixtures, and connectors.
Safety Precautions
Safety is of utmost importance during any electrical installation. Always turn off the power to the circuit you will be working on at the breaker box. Use a voltage tester to ensure that the power is off before handling any electrical wires. If you are unsure about any aspect of the electrical work, it is recommended to consult a professional electrician.
Installation Steps
Mounting the Magnetic Track System
Measure and Mark: First, measure the area where you want to install the track lighting on the ceiling. Use a level to ensure that the track is straight. Mark the positions for the mounting brackets along the track.
Install the Mounting Brackets: Drill holes in the ceiling at the marked positions and insert the wall plugs. Then, attach the mounting brackets to the ceiling using screws. Make sure the brackets are securely fastened.
Install the Track: Place the track onto the mounting brackets. For our magnetic track system, the track simply clicks into place on the brackets, thanks to the magnetic connection. This makes the installation process quick and easy. The Flame Track Lights and Polaris Track Lights' tracks are designed to be lightweight yet durable, ensuring a stable installation.
Attaching the Light Fixtures
Prepare the Light Fixtures: The light fixtures of the Flame Track Lights and Polaris Track Lights are equipped with COB LED technology. Before attaching them to the track, check that the fixtures are in good condition.

Connect the Fixtures to the Track: For our magnetic track system, the light fixtures can be easily attached to the track. They simply snap onto the track due to the magnetic connection. You can position the fixtures along the track according to your lighting needs. The fixtures are adjustable, allowing you to direct the light in different directions.
Wiring the Fixtures: Once the fixtures are attached to the track, connect the wires. The track lighting comes with clear wiring instructions. Strip the ends of the wires and connect them according to the color - coding. Use electrical tape to secure the connections.
Testing the Installation
After completing the installation, turn the power back on at the breaker box. Test the dimmable led track lights to ensure that they are working properly. You can adjust the brightness of the Flame Track Lights and Polaris Track Lights using a compatible dimmer switch. Check that the light output is even and that the fixtures are functioning as expected.
Installation Tips and Tricks
When choosing the location for the track lighting, consider the function of the room. In a living room, you may want to place the track to highlight a focal point such as a fireplace or a piece of art. In a kitchen, focus on illuminating the countertops and cooking areas.
If you plan to install multiple track lights, make sure to space them evenly for a balanced lighting effect.
When adjusting the position of the light fixtures on the track, make sure they are firmly attached to ensure stable operation.

In conclusion, installing our ceiling - mounted track lighting, whether it's the Flame Track Lights or the Polaris Track Lights, is a straightforward process. With our magnetic track system and easy - to - follow instructions, you can quickly and safely install these dimmable COB LED track lights in your home or business. These products not only offer excellent lighting performance but also add a touch of style to any space. As a magnetic track light supplier, we are committed to providing you with high - quality products and a seamless installation experience. We encourage you to explore our range of ceiling - mounted track lighting and transform your space with our innovative lighting solutions.
It is recommended that you upgrade the latest browser
 Edge
Edge


