


In the world of home lighting, achieving the perfect lighting effect is a combination of choosing the right fixtures and installing them correctly. Recessed downlights play a crucial role in creating a stylish and functional lighting environment. At IMIGY Lighting, we take pride in offering top - notch recessed downlights, especially our Phoenix Down Lights and Explorer Down Lights. In this article, we will guide you through the precise installation process to ensure you get the most out of these high - quality products.
The Significance of Recessed Downlights in Home Lighting
Recessed downlights, also known as downlight ceiling fixtures, are a popular choice among homeowners for their sleek and unobtrusive design. They are installed flush with the ceiling, creating a clean and modern look. Round recessed downlights, in particular, add a touch of elegance and can blend well with various interior styles.
These downlights, especially those with down light LED technology, are highly energy - efficient. They provide focused and bright illumination, making them ideal for task lighting in areas such as kitchens, bathrooms, and home offices. In a hall, recessed downlights can highlight architectural features or decorative elements, enhancing the overall aesthetic of the space. Flush downlights also contribute to a clutter - free look, as they don't protrude from the ceiling, which is especially beneficial in rooms with low ceilings.
IMIGY Lighting: Your Trusted Partner in Lighting Installation
At IMIGY Lighting, we are committed to providing not only high - quality lighting products but also comprehensive guidance on installation. Our Phoenix Down Lights and Explorer Down Lights are designed with both functionality and style in mind, and proper installation is key to unlocking their full potential.
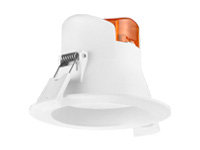
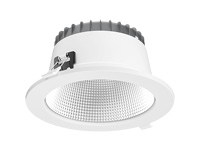
Phoenix Down Lights: Precision Installation for a Radiant Glow
Our Phoenix Down Lights are a testament to our dedication to quality and innovation.
Design Features
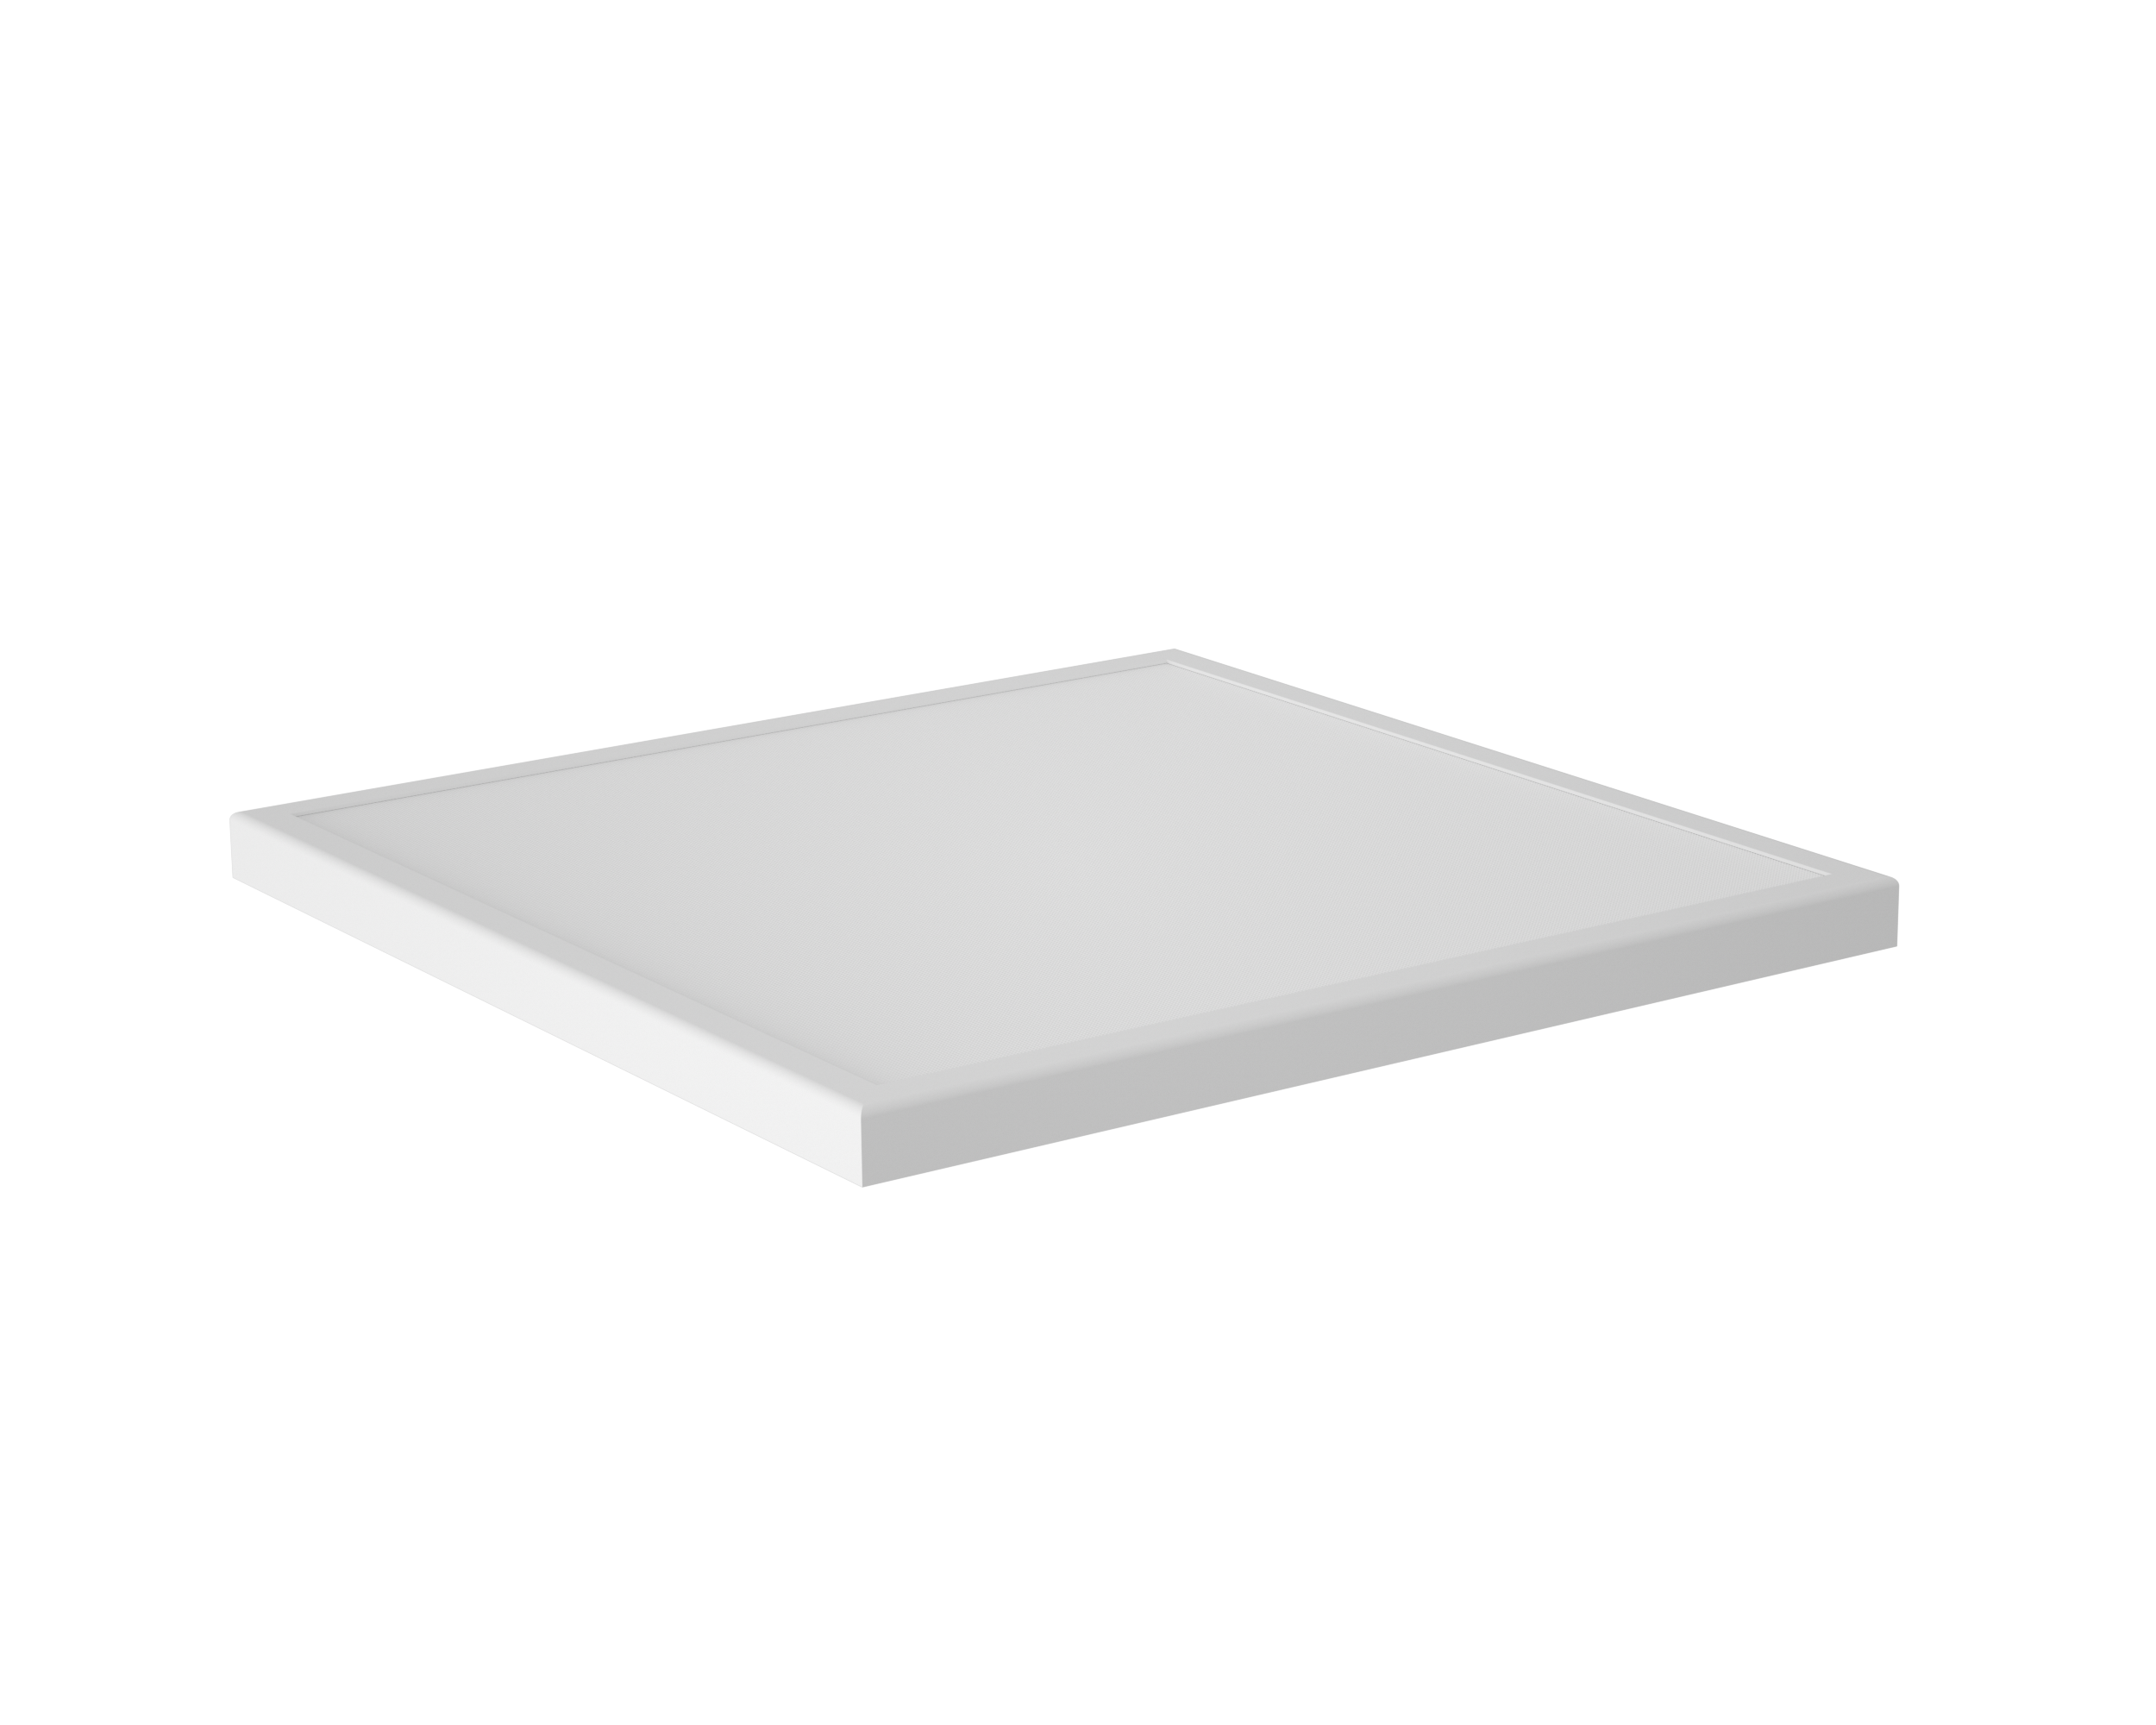
The Phoenix Down Lights feature a unique and modern design. The round recessed downlight shape gives it a classic and timeless look that can complement a wide range of interior decors. The frame is crafted from high - quality materials, ensuring durability and a long - lasting, elegant appearance. The finish of the light fixture can be customized to match different room styles. A white finish gives a clean and fresh look, perfect for a minimalist or Scandinavian - style room. It creates a bright and airy atmosphere, making the space feel more open. A brushed nickel finish, on the other hand, adds a touch of sophistication and industrial charm, making it suitable for a more contemporary or urban - inspired room.
Installation Steps
Preparation: Before starting the installation, make sure to turn off the power to the ceiling area at the circuit breaker. This is a crucial safety step to prevent any electrical accidents. Gather all the necessary tools, such as a screwdriver, pliers, and a ladder. Also, carefully unpack your Phoenix Down Light and check for any damages.
Cutting the Hole: Measure and mark the location on the ceiling where you want to install the downlight. Use a hole saw or a drywall saw to cut a hole in the ceiling. The size of the hole should match the specifications of the Phoenix Down Light. Be careful not to damage any electrical wires or other components in the ceiling.
Mounting the Fixture: Insert the mounting brackets of the Phoenix Down Light into the hole in the ceiling. Secure the brackets to the ceiling using screws. Make sure the brackets are firmly attached. Then, connect the electrical wires of the downlight to the corresponding wires in the ceiling. The black wire of the downlight should be connected to the black (hot) wire in the ceiling, the white wire to the white (neutral) wire, and the green or bare copper wire to the ground wire. Make sure the connections are secure.
Installing the Bulb and Cover: Once the electrical connections are made, install the LED bulb in the Phoenix Down Light. Choose a high - quality down light LED bulb that is compatible with the fixture. Then, attach the cover of the downlight. The cover not only protects the bulb but also helps to direct the light in the desired direction.
Testing the Light: After the installation is complete, turn on the power at the circuit breaker and test the Phoenix Down Light. Check if the light is working properly and if the illumination is as expected. If there are any issues, turn off the power immediately and check the connections.

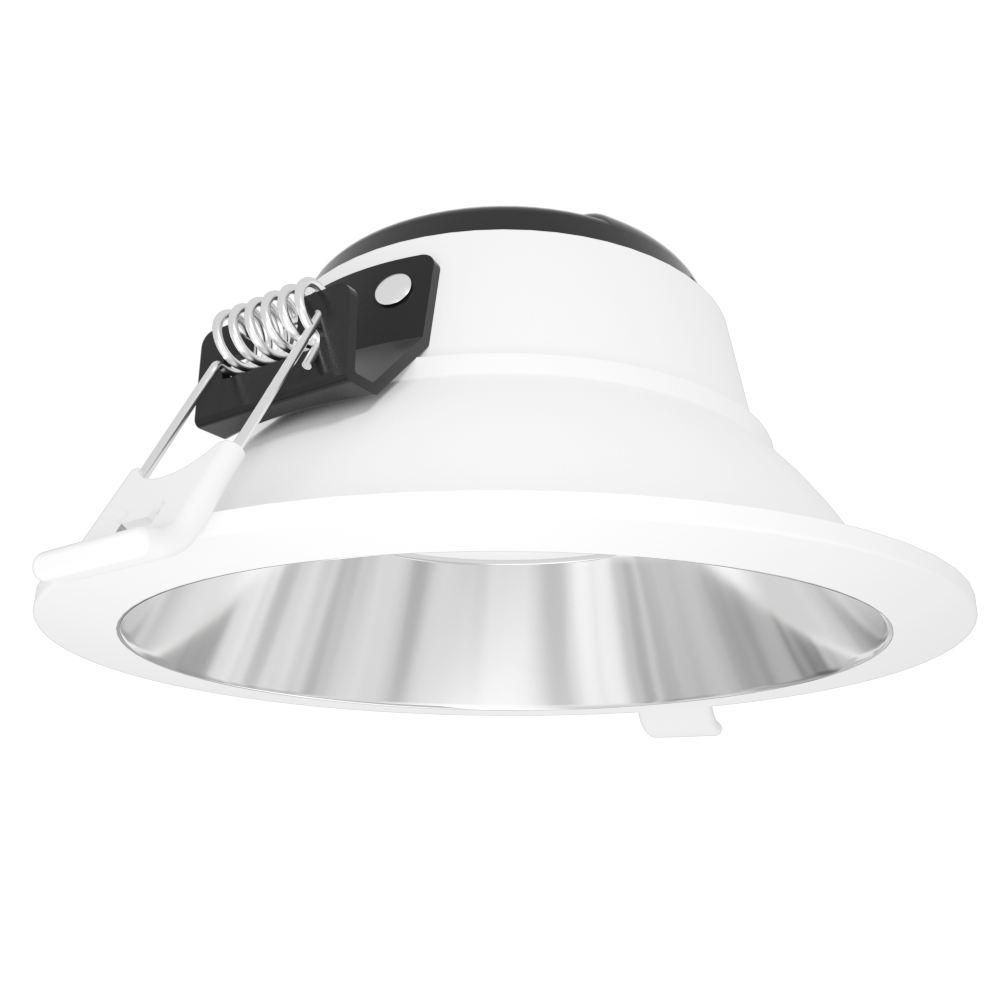
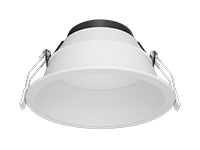
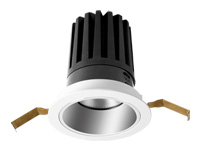
Explorer Down Lights: Installation for a Versatile Lighting Solution
Our Explorer Down Lights are designed to provide a versatile lighting solution for various spaces.
Design Features
The Explorer Down Lights have a distinct and functional design. The round recessed downlight is equipped with advanced optics to provide a wide - angle and even distribution of light. The frame is made from high - quality, heat - resistant materials, ensuring long - term performance. The finish options include a matte black finish, which gives a bold and modern look, perfect for a contemporary or industrial - style room. It creates a sense of depth and drama, adding a focal point to the space. A white - painted finish, on the other hand, offers a clean and classic look, suitable for a more traditional or minimalist room.
Installation Steps
Initial Checks and Planning: Similar to the Phoenix Down Lights, start by turning off the power at the circuit breaker. Plan the layout of the Explorer Down Lights on the ceiling, considering the lighting needs of the room. Measure and mark the locations for the holes.
Hole Cutting and Mounting: Use a suitable cutting tool to create holes in the ceiling according to the size requirements of the Explorer Down Lights. Install the mounting brackets in the holes and secure them firmly to the ceiling.
Electrical Connections: Connect the electrical wires of the Explorer Down Light to the ceiling wires following the correct color - coding. Ensure that all connections are tight and insulated properly.
Fixture Assembly and Bulb Installation: Assemble the Explorer Down Light by attaching the main body to the mounting brackets. Install the down light LED bulb, making sure it is properly seated.
Final Adjustment and Testing: After installing the cover, adjust the direction of the light if necessary. Then, turn on the power and test the Explorer Down Light. Check for any uneven lighting or other issues.
In conclusion, installing recessed downlights, such as our Phoenix Down Lights and Explorer Down Lights, precisely is essential for achieving a perfect lighting effect. By following the proper installation steps and taking advantage of the unique design features of these products, you can create a well - lit and stylish living space. Whether you are looking to enhance the functionality of your kitchen, add a touch of elegance to your hall, or create a cozy atmosphere in your bedroom, our recessed downlights can meet your needs. We encourage you to explore our product range and take the first step towards a more beautiful and well - lit home. Let the innovation and quality of our IMIGY Lighting products transform your lighting experience.
It is recommended that you upgrade the latest browser
 Edge
Edge


